

A few months ago I was applying for a new role and I was able to give my LinkedIn profile (which was mostly up to date). The recruiter replied later and said that the team was interested in meeting and..
“Can you send me a copy of your resume?”
See the last time I worked on my resume it was on… Apple Pages 🤦♂️. Which was a problem since I hadn’t owned a Mac in almost a decade.
Maybe you wrote yours in Word, and now you don’t have access to Word. Or maybe it renders strangely in the new version. Have you edited it lately? Having to deal with things like messing with weird tables and odd formatting. The bullet points are different font sizes and it just looks sloppy.
So how do you avoid this ecosystem lock in? Use JSON!
By the end of this you’ll learn about JSON Resume:
- Learn how to use the JSON Resume schema.
- See and configure the different hosting options.
- Style your resume by exploring the different themes.
- Be able to quickly create your resume on Netlify.
Want the tl;dr?
- Clone my resume repository
- Update the
resume.jsonwith your info. - Setup netlify to build your new clone with
yarn build.
JSON Resume to the Rescue#
JSON Resume is a community driven open source initiative to create JSON-based standard for resumes. - https://jsonresume.org/
JSON Resume is a FOSS project that allows you to codify the data of your resume into JSON. It offers a simple schema to easy add/remove/update your resume over time.
You can see an example of complete resume at on the Schema page.
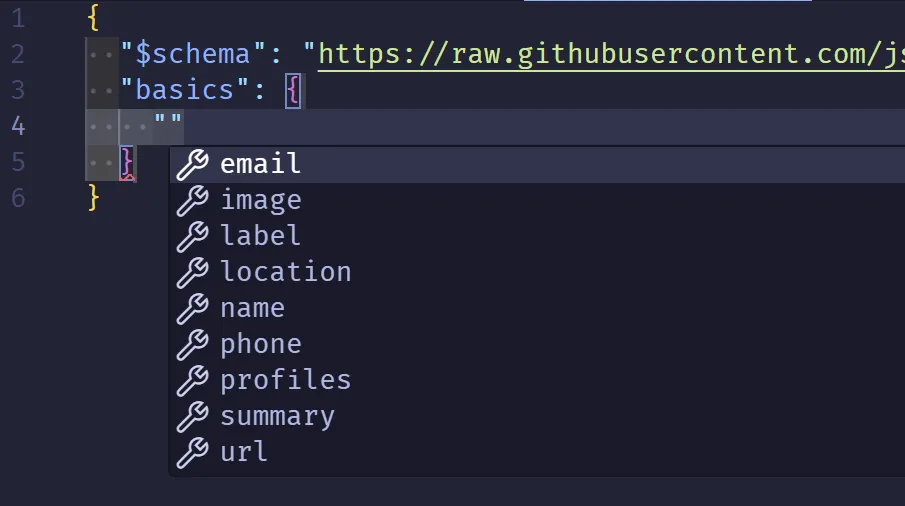
The one thing i would suggest is adding the schema to top of your JSON:
{
    "$schema": "https://raw.githubusercontent.com/jsonresume/resume-schema/v1.0.0/schema.json",
}
If your editor supports it, which VS Code does, you’ll now get IntelliSense support for adding info.
Install It#
Once you have your resume json ready you can start to build it with resumed which is an NPM package.
You will need to install it and find and install the theme you want. To see all
the possible themes check out this
jsonresume-theme search. I personally like the jsonresume-theme-elegant theme.
npm install resumed jsonresume-theme-elegantBuild It#
Once it’s installed you’ll want to build your resume with the command: resumed render. This should create a resume.html page!
Rinse and repeat as you make changes.
Serve It#
Once you’ve built your resume html you now need to service it over the web. You have a few options to do that.
- Post your
resume.jsonas a gist and it’ll automatically show up. - OR Use a static site hosting service where you can build your resume, just like you just did.
- OR Do both!
Gist#
The gist is the easiest way to share your resume.
- Go to https://gist.github.com/
- Create a new gist called
resume.json - Paste in your json.
- You can then go to registry.jsonresume.org/heyitsgilbert where you replace
heyitsgilbertwith your github username.
Netlify#
This is my preferred way because it allows me to easily build my static content and serve it under my personal resume.
- Make a GitHub repository to host your resume, and few other files.
- You can make this easy by cloning my
resume repository and updating
the
resume.json
- You can make this easy by cloning my
resume repository and updating
the
- Create an account or sign in on Netlify.
- Grant access to your new resume repository.
- Then you have to configure your build.
Quick note about my repository. I have a public folder with a .gitkeep file in
it so the directory always exists. In my packages.json build step I copy the resume.html to
public\index.html.
On Netlify you typically have to tell it what your build steps. Since the packages.json file has my build step defined, I tell it use that via yarn build.
Here are my “Build Settings”
- Runtime: Not set
- Base directory: /
- Package directory: Not set
- Build command:
yarn build - Publish directory: public
- Functions directory: netlify/functions
So the only real “magic” is telling it to run the build step.
Both#
To do both you can just take your JSON from your repository and upload it to your gist every time it updates.
For GitHub you can use a github workflow with an action like exuanbo/actions-deploy-gist. You can see an example of how I do it at gist.yml. Note that your gist id will be unique.
Tips#
resumedoutputsresume.html, but you can rename it to whatever you want.- Make your “live” version long, and tweak your JSON to generate role specific
resumes.
- AI is excellent at transforming structured data like JSON!
- Find a theme that prints well so you can easily print to PDF.
This was a quick one I put together. Feel free to let me know if you have any questions/suggestions!
